
While some of us may be starting to go back to church, primary still isn’t part of the plan just yet. There are a few ways that missionaries catch kids’ attention to teach them. Here are some of their visual aids for teaching that gospel that are great for teaching children different gospel principles.
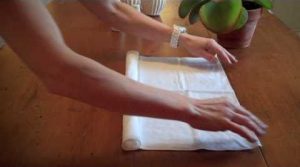
The Napkin Chicken
Needed Materials:
a cloth napkin or dishtowel. The thinner the fabric, the better. You probably don’t want to try this with a paper napkin because it will tear.
The Lesson:
Visual aids like this can be presented as a magic trick of sorts. Maybe start by saying, “What if I told you I could turn this napkin into a chicken?” As you roll the two sides of the napkin in and fold it in half, talk about the covenant path. when you get to the point where you are going to pull the inside pieces upwards talk about how faith, repentance, baptism, and the gift of the Holy Ghost are what help you endure to the end. Each roll represents a different principle and in the end, we have a chicken! It’s just kind of a fun way to teach.
How to:
- Lay the napkin or dish towel flat on a table.
- Roll it inwards on one side stopping in the middle.
- Roll it inwards on the other side stopping in the middle again so that the two rolls meet.
- Fold the napkin in half so that the rolls are facing the inside.
- Hold it so that you see four small circles at the top.
- Pull the tab of fabric inside of each of these circles firmly. These will become your chicken’s legs.
- Grab the top two rolls and the bottom two rolls and pull them apart.
- Tada! You have a rotisserie chicken!
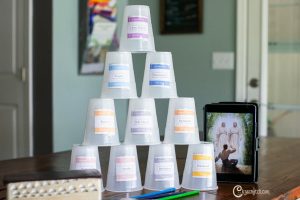
Cup Stacking
Needed Materials:
10 paper cups and a sharpie. You can also print out pictures to paste to the cups if you would like. Some missionaries have even put this lesson into a song. There are also printables available if you don’t like your handwriting.
The Lesson
This exercise is used to teach about the foundation of the church, the apostasy, and the restoration. The first line of cups has 4 cups labeled Apostles, prophets, priesthood, and revelation. As you assemble this line, talk about how the church was built when Christ was on the earth.
The second layer will have 3 cups labeled baptism, Holy Ghost, and sacrament. The third layer has 2 cups labeled temples and missionaries. Finally, the top cup is labeled Jesus Christ because Christ is the head of the Church.
After you have built your pyramid, remove the prophets and revelation cups from the bottom. Explain that the removal of these things from the earth is what began the apostasy. As you reassemble the pyramid, talk about the restoration of the gospel through the prophet Joseph Smith.
How To:
- Start by placing on a flat surface 4 cups in a line. This will become your base.
- Slowly stack the cups into a pyramid while talking about what it takes to build the church.
- Once your pyramid is built with 4 cups on layer one, 3 cups on layer two, 2 cups on layer three, and 1 cup on layer four, remove the bottom corner cups.
- Watch the pyramid fall.
- Rebuild the pyramid.
Related Link: Activities to Remember the Restoration of the Aaronic Priesthood
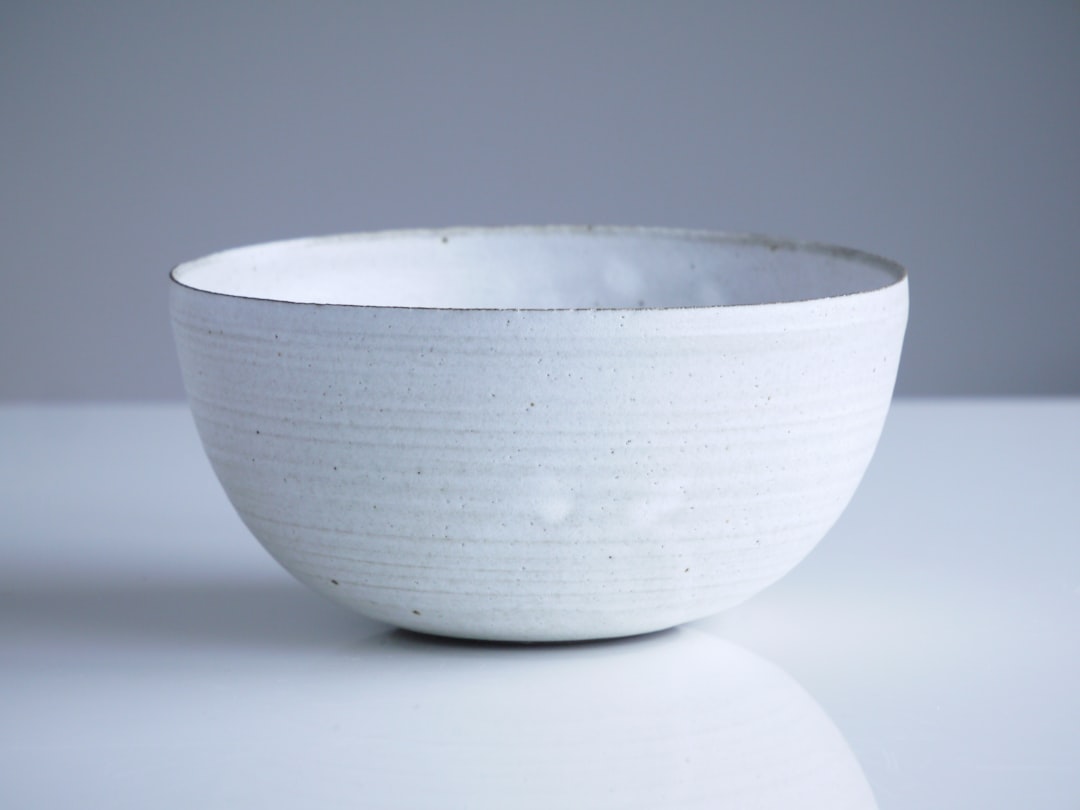
Bowl of Water
Needed Materials:
A bowl, water, salt, pepper, and dish soap
The Lesson:
This lesson is used to teach about the dangers of sin and the joy that can be found in repentance. While sprinkling salt into the bowl have the kids name some of the good things that they do to keep the commandments.
As you sprinkle pepper into the bowl, have the kids talk about some of the ways that sin can cloud the good things we do. As they stick a finger in the bowl and the pepper sticks to them, explain that sins can stick with us for a long time.
The dish soap represents repentance. As you touch the surface of the water with the dish soap on your finger, explain that repentance is what can free us from sin (pepper).
As far as visual aids go, kids LOVE this one because they think that it’s magic.
How To:
- Fill a bowl with lukewarm water.
- Sprinkle salt into the bowl.
- Sprinkle pepper into the bowl.
- Have the kids stick a finger in the bowl and watch the pepper stick to their fingers.
- Put a drop of dish soap on your index finger.
- Gently touch the surface of the water and watch the pepper move to the sides of the bowl.
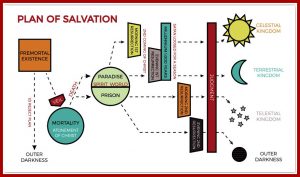
POS Cut-Outs
Needed Materials:
A paper cut out for each step of the Plan of Salvation. Laminated is best if you would like to use these again in the future.
The Lesson:
This is one of the most common visual aids and is the best way to teach about the Plan of Salvation. As you lay out each step of the plan, explain what happens within them. For pre-mortal life, explain that this is where we lived with Heavenly Father before we came to earth. Then explain birth, earth life, death, and so on while placing each piece down in the right order.
This is a great way for kids and other visual learners to see and understand that where we are now is only a small part of the plan. There is so much more waiting for us, and this can be comforting especially when families experience loss or heartache.
How To:
- Find a flat surface to place the puzzle on.
- Lay a piece down as you explain that section of the plan.
- The order should be:
- Premortal Life
- Birth
- Earth Life
- Death
- Spirit World (Paradise/Prison)
- Resurrection
- Judgment
- Kingdoms of Glory (Celestial, Telestial, and Terrestrial
Related Link: Guide to Helping Children with Autism at Church
Pillow Fort
Needed Materials:
Couch cushions, blankets, and pillows.
The Lesson:
As a missionary, we would get approval from parents before doing this activity, but if you’re at home, it’s really fun to do with your kids. The lesson is based on Mosiah 2:6 which says, “they pitched their tents round about the temple, every man having his tent with the door thereof towards the temple . . .”
This is lesson is a good reminder to us all that it is important to keep our sights set on the temple and heed the words of the prophet.
How To:
- Place a picture of a temple somewhere in the room where they can see it, but it’s not too obvious.
- Time them to see how fast they can “pitch their tents towards the temple” by making a pillow fort with a door facing the temple.
- Have them make one fort if you are all in the same family.
- As you all gather in the fort, talk to them about the importance of always keeping the temple in your sights.
Visual aids are a wonderful way for children to remember the lessons that you teach them. Giving them a way to connect the dots makes them feel smart and will allow them to remember the lesson attached to the activity more easily.
What are your favorite visual aids to teach with? Share in the comments.


